
HELLO! 😀
I hope you are doing well.
As mentioned in my previous post, I’m taking on a 2025 monthly bag challenge where I sew new bags from my pattern stash. The criteria for this year’s challenge is to choose a bag pattern I’ve never sewn before, from different designers every month. My goal is to learn new techniques in bag making, refine my sewing skills, develop a better sense of the fabrics I love to use, and eventually learn to design my own bags.
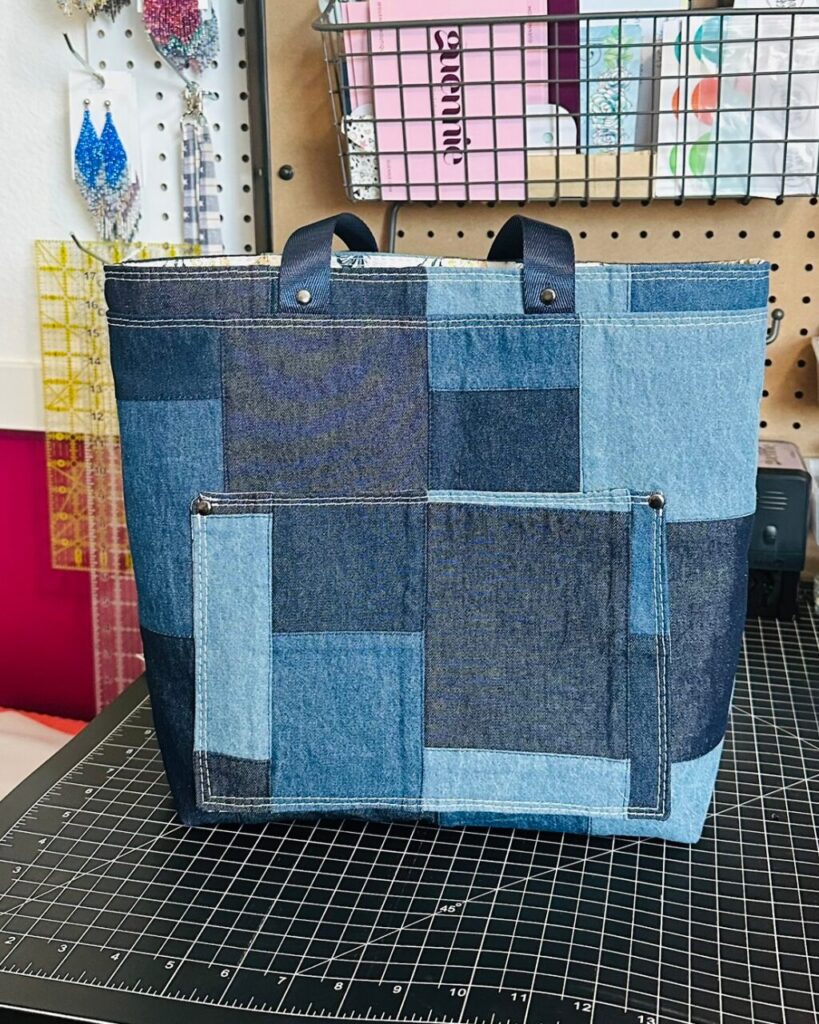
Why This Bag?
To ease myself back into bag-making, I chose the simple yet elegant Sheridan Tote Bag by Sotak Handmade. It was one of the videos I watched during my recovery from surgery, and I was shocked by how much muscle it took just to cut fabric with a rotary cutter—or even to “birth” a bag! As a right-handed person, it was especially challenging, which made me lose the motivation to sew larger bags for a while.
The size of this tote is neither too big nor too small—it’s just right, in my opinion. It measures about 11 inches wide, 12 inches tall, and 4 inches deep, with a functional front pocket. I also love the small rivet accent added to the bag. Just so cute!

What Materials Did I Use?
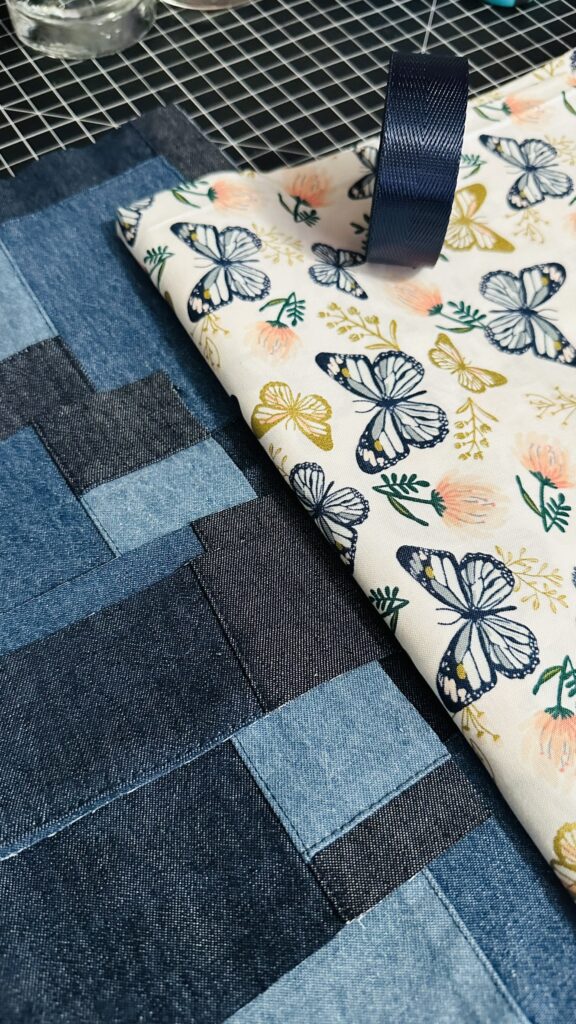
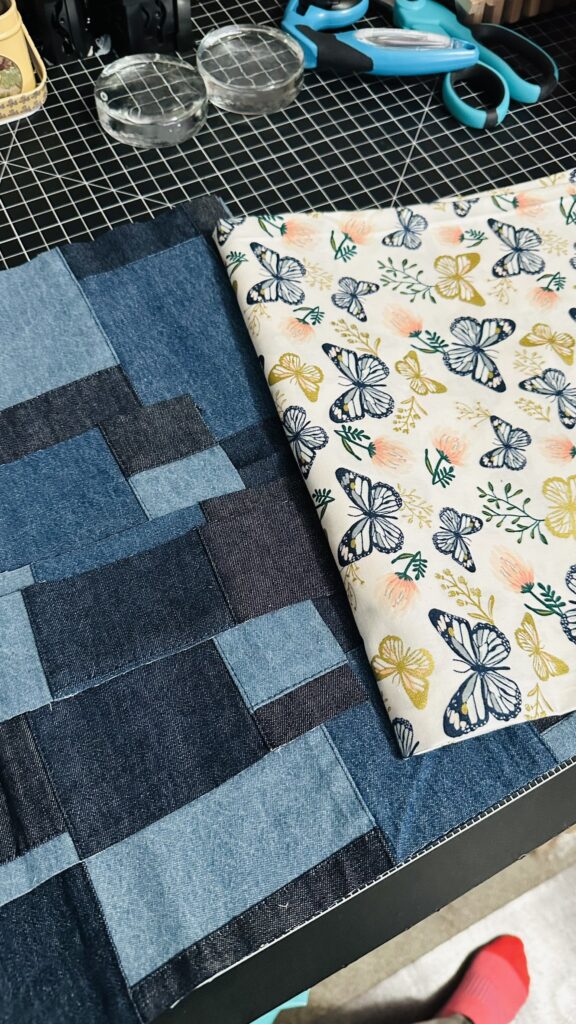
For the exterior fabric, I chose patchwork denim, and for the lining, I chose cotton fabric, both from JoAnn’s. Unfortunately, I can no longer find the link to the lining fabric, so I’m not sure if it’s still available or not. If you have it, feel free to share the link in the comments below. For the stabilizer, I used Pellon SF101, which helps minimize stretch and provides some structure to the bag. The straps are 1 inch nylon webbing from Amazon.
My cousin Hannah inspired me to get the patchwork denim fabric. She wanted a tote bag made of different denim hues, and luckily, Joann’s already had a ready-made one. LOL. I’ve never quilted, so I am not sure if I will enjoy piecing tiny pieces together to accomplish this look. 🙂 As for the lining, I really love the navy blue butterflies because they match the dark denim exterior fabric, and I adore the gold shine accents on the print as well. Definitely checks the “cute box” criteria. 😀
What Are The Hardware & Tools Needed?
The only hardware on this bag is rivets. I chose shiny black rivets because they go very well with the navy blue nylon webbing strap and the denim patchwork fabric. There are lots of rivet packs available on Amazon in different colors. 🙂
I sew with 2 sewing machines: I use my Sailrite Ultrafeed LS1 machine for thick layers and my Brother CS6000i for thin layers, like the lining of this bag. This helps me stay efficient, as I don’t need to mess with the tension on the machines. I also use rotary cutter and ruler to cut my fabrics, and scissors for small, short cuts like the straps and box corners. For installing rivets, I use a rivet press from KAMsnaps—it’s the easiest way to do it. It’s a bit pricey but if you make bags often like I do, it’s so worth it.

How I Made The Bag?
1. Study the Pattern. Always watch the full tutorial video or read the whole pattern instructions before starting.
I watched Sotak Handmade’s video tutorial all the way through before I began cutting and sewing the bag, which is always my preferred approach. I do the same when working with a PDF pattern to avoid any surprises while sewing. Her tutorial is very intuitive and easy to follow, making it great for beginners.
2. Cutting the Fabric
I have a specific cutting order that I always follow to stay organized and efficient. I begin with the exterior fabric, then move on to the lining, and finally cut the stabilizer. This helps me keep track of all the pieces as I go along. Additionally, I always start with the larger pieces first before cutting the smaller ones. This way, I can make the most of the fabric and minimize waste. Following this order also ensures that I’m not rushing through any step, and I can focus on each piece individually without any confusion.
It took me two days to cut the fabric and apply the interfacing for this particular bag. If we are talking about total hours, roughly around 1-2 hours in total. For those who are new here, I typically craft at night during the weekdays and spend about 4-6 hours on Saturdays working on projects. I make a conscious effort to keep Sundays as my rest day.
3. Sewing
The most challenging part of sewing this bag was definitely dealing with how stretchy the exterior fabric was, combined with the bulk where the fabric joins. It added an extra layer of difficulty, especially when it came to sewing through the thick seams in the patchwork denim, where there’s already a seam between the patches. If you’re using a domestic sewing machine, it might be a bit of a struggle to get through those areas, as the machine has to handle both the stretchiness of the fabric and the extra thickness of the seams. I found myself having to go slow and carefully adjust the tension and pressure, making sure everything was aligned and stitched properly. It definitely required a little more patience, but with some persistence, I was able to power through. If you’re working with similar fabrics, it’s a good idea to be prepared for these little obstacles and maybe consider using a heavy-duty needle or adjusting your machine settings to help with the bulk.


What’s My Overall Assessment?
This project was an absolute joy to sew! It was simple, yet so satisfying, and the finished tote is absolutely beautiful. The design of the bag is really well thought out, and I love how everything came together. The construction, in particular, is really smart—it feels sturdy and practical, while still looking stylish. One of my favorite details is how the straps are attached to the bag; the method used is both functional and visually appealing, giving the tote a unique and polished look. Overall, it was a fantastic sewing experience, and I’m so happy with how it turned out!

What Am I Sewing Next?
I’ll be out of the country for most of February on vacation, so I’m thinking of working on another simple bag before I go, as I’ll only have a few days to actually dedicate to it. I’d love to make something practical for my trip, so I’m wondering if you have any suggestions for a bag that would be useful to take with me. I’m hoping to decide on something soon so I can get everything prepped and start right at the beginning of the month. If you have any ideas or recommendations, please drop them in the comments below—I’d love to hear your thoughts!
Have a fabulous weekend!